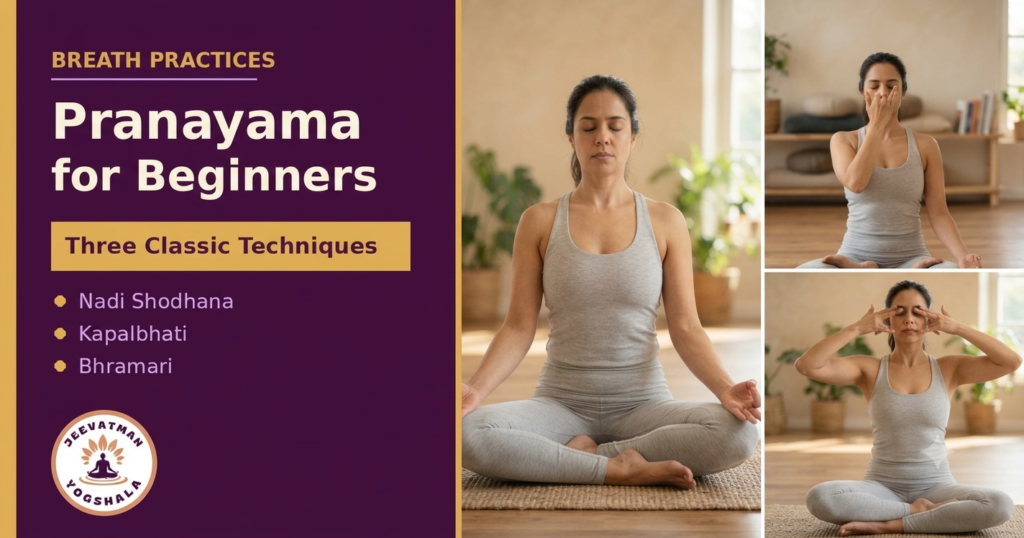
Quick Answer: Pranayama is the yogic practice of working with the breath, and pranayama for beginners usually starts with three popular techniques: Nadi Shodhana (alternate nostril breathing), a calming practice; Kapalbhati (also spelled Kapalabhati), a quick, energising technique of forceful exhales; and Bhramari, a soothing humming breath. Start with Nadi Shodhana and Bhramari, keep the breath slow, steady and never forced, and learn Kapalbhati with a teacher because it is more vigorous and not suitable for everyone. Pranayama is a wellbeing practice, not a medical treatment.
Breathing is something you do all day without thinking, so it can feel strange to hear that there are techniques for it. Yet breath practices, known as pranayama, have been part of yoga for centuries, and beginners often find them one of the simplest ways to feel calmer and more focused.
This guide to pranayama for beginners explains three classic techniques step by step: Nadi Shodhana, Kapalbhati and Bhramari. You will also find a simple routine, safety cautions and common mistakes. It is general information, not medical advice.
Important Distinction: These three practices feel very different. Nadi Shodhana and Bhramari are gentle and calming, while Kapalbhati is a vigorous technique that involves forceful exhales. Beginners should not treat them as interchangeable, and anyone with a heart condition, high blood pressure or other health concerns should check with a doctor first.
What Is Pranayama?
Pranayama combines two Sanskrit words: prana, often translated as life force or vital energy, and ayama, meaning to extend or regulate. In practice, pranayama means consciously guiding the breath through specific patterns of inhaling, exhaling and sometimes pausing.
Traditional texts place pranayama as one of the limbs of yoga, and it is also part of the Government of India's Ministry of AYUSH Common Yoga Protocol, which describes breathing practices that should be slow, steady and controlled, and never forced. That is a helpful rule for every beginner.
Research on breathing practices is still developing and often involves small studies, so the benefits should not be overstated. Many people find that slow, rhythmic breathing helps them relax and focus. For other calming practices, see our guides on yoga for mental health and Nada Yoga, the ancient yoga of sound.
Before You Start Pranayama for Beginners: Simple Ground Rules
- Choose a calm place with fresh air and few distractions.
- Practise on a light stomach, often several hours after a meal.
- Sit comfortably with your spine tall, on a cushion, a chair or the floor.
- Breathe through your nose unless a technique says otherwise.
- Never force the breath: keep it smooth and comfortable.
- Stop if you feel dizzy, lightheaded, short of breath or uncomfortable, and breathe normally.
- Learn with a teacher where possible, especially for Kapalbhati.
Nadi Shodhana: Alternate Nostril Breathing
Nadi Shodhana, often called alternate nostril breathing, is a gentle, balanced technique. Nadi means channel and shodhana means cleansing, and the practice is traditionally described as purifying the energy channels. Many beginners find it calming and centring.
How to do Nadi Shodhana step by step
- Sit tall and relax your shoulders. Rest your left hand on your left knee.
- Raise your right hand and fold your index and middle fingers toward your palm, so your thumb and ring finger are ready to close your nostrils.
- Close your right nostril with your thumb. Breathe in slowly through your left nostril.
- Close your left nostril with your ring finger, release your right nostril, and breathe out slowly through the right.
- Breathe in through the right nostril, close it, release the left, and breathe out through the left. This is one round.
- Continue for five to ten rounds, keeping the breath smooth and silent, then release your hand and breathe normally.
Begin with an equal count for the in-breath and the out-breath, such as four counts in and four counts out, with no breath holding. Retention and longer ratios are best added later with guidance from a teacher.
Practical Tip: If your nose is blocked, breathe gently and do not push. If you feel pressured or lightheaded, return to normal breathing. A comfortable practice is better than a perfect technique.
Kapalbhati: The Skull-Shining Breath
Kapalbhati, also written Kapalabhati, is a more energising technique. It is made up of quick, forceful exhales through the nose, produced by a sharp contraction of the lower belly, followed by passive inhales that happen on their own. It is traditionally described as one of the cleansing practices, called kriyas.
How to do Kapalbhati step by step
- Sit tall in a comfortable seated position with your hands resting on your knees.
- Take a slow, deep breath in.
- Exhale sharply through your nose by drawing your lower belly in toward your spine, then let your belly relax so the inhale happens naturally.
- Continue with a steady, comfortable rhythm, keeping your face, shoulders and chest relaxed.
- After a short round, take a slow deep breath in, breathe out fully and rest with normal breathing.
- Repeat for a couple of rounds, resting between each.
For beginners, start slowly and gently, for example with a small number of strokes at a time, and increase gradually under guidance. The Common Yoga Protocol describes a pace of around 40 to 60 strokes per minute for the full practice, but beginners should be much slower and build up over time.
Who should not practise Kapalbhati
Because it is vigorous, Kapalbhati needs more care. According to AYUSH guidance for yoga practitioners, people with hypertension, cardiac problems, respiratory distress or a slipped disc should not do it. Many teachers also advise caution, or avoiding it, in pregnancy and with a hernia, stomach ulcers, epilepsy or recent abdominal surgery. If you are unsure, skip it and choose a gentler practice.
Important Distinction: Kapalbhati is not a deep, slow breath. It is quick and forceful, and it should never feel strained. If you feel dizzy, lightheaded, faint or have chest or abdominal pain, stop and breathe normally.
Bhramari: The Humming Bee Breath
Bhramari takes its name from the Sanskrit word for a large black bee. It uses a steady, low humming sound on the out-breath, which many people find soothing. It is one of the gentlest pranayama practices and a good place for beginners to start.
How to do Bhramari step by step
- Sit tall and relax your face, jaw and shoulders. Close your eyes if you like.
- Lightly rest your fingers on the cartilage in front of your ears, or simply keep your hands on your knees. Do not push into the ear canal.
- Breathe in slowly through your nose.
- With your lips closed and your teeth slightly apart, breathe out slowly while making a steady humming sound, like a bee.
- Feel the vibration in your head, face and chest.
- Repeat for five to seven rounds, then rest in silence and notice how you feel.
Bhramari links naturally with the yoga of sound. Our guide to Nada Yoga explores humming and chanting in more depth. Take extra care, and keep the sound soft, if you have an ear infection or ear problems, and speak to a doctor if you have tinnitus.
Nadi Shodhana vs Kapalbhati vs Bhramari at a Glance
| Practice | Feel | Best For | Beginner Tip | Caution |
|---|---|---|---|---|
| Nadi Shodhana | Calm and balanced | Settling and focusing | Equal in and out counts, no holding | Keep the breath gentle if you are blocked or lightheaded |
| Kapalbhati | Energising and quick | A short wake-up | Start slowly and learn with a teacher | Avoid with hypertension, heart problems, breathing difficulty or a slipped disc |
| Bhramari | Soothing and vibrational | Easing a busy mind | Keep the hum soft and steady | Take care with ear problems |
A Simple 10-Minute Pranayama for Beginners Routine
- Settle (1 minute): sit comfortably and watch your natural breath.
- Kapalbhati, optional (1 to 2 minutes): only if you are suitable and have been shown how, with plenty of rest.
- Nadi Shodhana (4 minutes): five to ten smooth rounds.
- Bhramari (3 minutes): five to seven rounds of soft humming.
- Rest (1 to 2 minutes): sit in silence and notice how you feel.
If you skip Kapalbhati, simply extend the Nadi Shodhana and Bhramari. Practise at roughly the same time each day, such as in the morning or early evening, for ten minutes or even less. Gentle options also work well before bed; see our guides on yoga for sleep and sound healing for sleep and insomnia.
Short breathing breaks are helpful during the day too. Our guide to yoga for desk workers includes quick resets that pair well with a few slow breaths.
Who Should Take Extra Care With Pranayama for Beginners
Pranayama is generally gentle when done slowly, but speak to a doctor or qualified teacher first if you have a heart condition, high or low blood pressure, asthma or breathing problems, epilepsy, a hernia, are pregnant, have had recent surgery or are managing a mental health condition. The National Center for Complementary and Integrative Health notes that yoga is generally considered safe for healthy people when practised appropriately, that you can get hurt, and that learning from a qualified instructor lowers risk.
- Stop if you feel dizzy, faint, short of breath or uncomfortable.
- Do not hold your breath or push your limits.
- Avoid breath practices that make you anxious or panicky, and return to normal breathing.
Common Pranayama Mistakes
Watch out for these frequent errors:
- Forcing the breath or holding it for too long
- Practising Kapalbhati too fast or too long as a beginner
- Tensing the face, neck and shoulders
- Practising on a full stomach
- Skipping guidance for more advanced techniques
- Ignoring dizziness, discomfort or health concerns
- Expecting instant results
Where Pranayama Fits in Your Yoga Practice
Pranayama for beginners is often practised after poses and before meditation. If you prefer a style that includes breathing work, read our comparison of Hatha vs Ashtanga yoga, or our guide on Kundalini awakening and yoga for another perspective on breath and energy. If you are new to yoga, our easy yoga poses and meditation tips for stress relief is a gentle place to start, and our guide to meditation for beginners shows how breath practice leads into meditation.
For Yoga Teachers: Teaching Pranayama Safely
If you teach, introduce pranayama gradually, offer simple options, explain who should avoid practices such as Kapalbhati and never push students to hold or force the breath. You can learn how to teach breathing practices and sequence classes safely in our 200-hour yoga teacher training in Rishikesh, and you can see what a typical day involves in our guide to the daily schedule of a 200-hour training.
Frequently Asked Questions
What is pranayama for beginners?
What is Nadi Shodhana?
What is Kapalbhati?
What is Bhramari pranayama?
Which pranayama is best for beginners?
How long should beginners practise pranayama?
When is the best time to practise pranayama?
Is pranayama safe?
Can pranayama help with stress or sleep?
Key Takeaway
Pranayama for beginners begins with slow, steady, comfortable breathing. Nadi Shodhana and Bhramari are gentle, calming places to start, while Kapalbhati is a vigorous practice that needs guidance and is not suitable for everyone. Keep the breath smooth, never force it, take care if you have health concerns, and build up gradually with a qualified teacher.
Want to Learn Breathwork Properly?
If you would like guided, step-by-step learning, you are welcome to review the course details and ask any questions about what the training covers. Take your time and choose what fits your goals.
Explore the 200-Hour Course DetailsThis article is general information, not medical advice. Pranayama is a wellbeing practice and not a treatment for any condition. If you have a heart condition, high or low blood pressure, breathing problems, epilepsy, are pregnant or have any other health concern, please speak to a qualified healthcare professional and an experienced yoga teacher before starting.